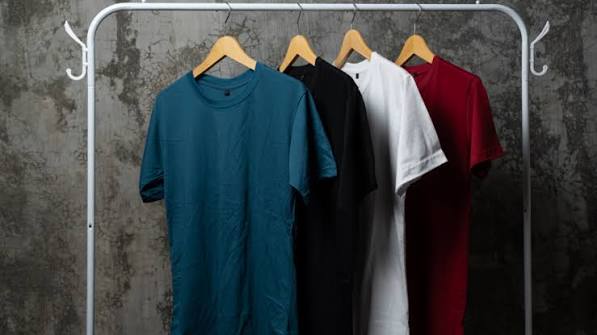

Hey there, fellow apparel creator! If you’re running an e-commerce fashion brand, a custom merchandise business in India, or managing apparel sourcing for clients, you know that absolute rush of excitement when a fresh sample T-shirt arrives from your manufacturing partner. You open the courier parcel, touch the fabric, try it on, and think, “Arre wah, this looks awesome!”
But wait! Before you get super excited and give your supplier the green light for a 1,000-piece bulk order, take a deep breath. Approving a pre-production sample without a systematic T-shirt sample approval checklist is like buying a car without taking a test drive—it can lead to absolute disaster!
One small defect missed during the sample evaluation stage—like a slightly loose neck rib, 3% extra fabric shrinkage, or a graphic print that cracks after one wash—will be multiplied by thousands of garments in mass production. That means customer returns, negative Amazon/Google reviews, dead stock, and lost profits. That is why having a foolproof garment sample checking routine is your biggest superpower in the clothing business.
In this comprehensive guide, we are sharing our battle-tested 25-point T-shirt sample approval checklist designed specifically for D2C brand founders, merchandisers, and apparel entrepreneurs. Let’s dive straight in!
📋 What Should Be Checked Before Approving a T-Shirt Sample?
Before issuing final approval for T-shirt bulk production, systematically inspect these 25 essential checkpoints across 7 key categories:
- Chest Measurement: Verify pit-to-pit width against tech pack tolerance (+/- 1 cm).
- Total Body Length: Check high-point shoulder (HPS) to bottom hem distance.
- Shoulder Width: Measure seam-to-seam straight across the back.
- Sleeve Length & Opening: Check shoulder point to cuff edge and armhole circumference.
- Neck Opening & Circumference: Test stretch recovery and collar drop depth.
- Measurement Tolerance: Ensure all dimensions strictly comply with allowed variances.
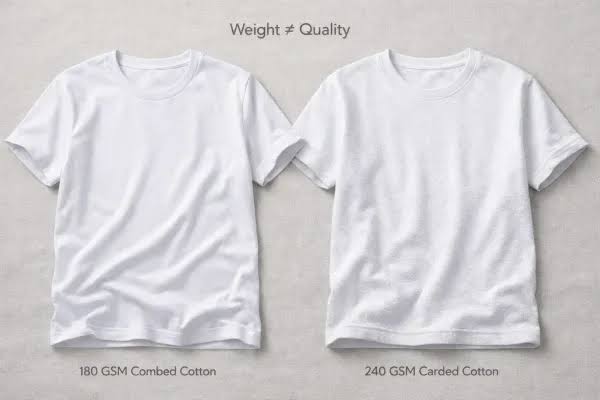
- Fabric GSM Test: Verify weight using a GSM cutter & digital scale (e.g., 180 GSM vs 220 GSM).
- Fiber Composition: Confirm material blend (100% combed cotton, 80/20 CVC, etc.).
- Fabric Shade Matching: Inspect under D65 standard light against Pantone/Swatches.
- Hand Feel & Softness: Evaluate bio-wash / silicon wash surface softness.
- Shrinkage Rate: Conduct a 40°C wash test (must stay within +/- 3-5%).
- Spirality / Torque: Check if side seams twist after washing.
- Side Seam Alignment: Verify seam straightness and tension.
- Shoulder-to-Shoulder Taping: Confirm reinforcement tape binding quality.
- Neck Rib Recovery & Stretch: Ensure 1×1 or 2×1 rib bounces back without gaping.
- Bottom & Sleeve Hemming: Verify twin-needle coverstitch tension and clean finish.
- Stitch Density (SPI): Check Stitches Per Inch (typically 10–12 SPI).
- Print Placement & Alignment: Measure exact distance from neck collar / chest center.
- Print Color Sharpness: Compare print shades against original artwork Pantones.
- Screen Print Registration: Ensure zero color bleeding or layer overlap misalignments.
- Print Hand Feel & Flexibility: Verify DTF/Plastisol prints don’t feel like stiff plastic sheets.
- Print Adhesion & Curing: Perform stretch and scratch tests to prevent peeling.
- Labels & Branding Accuracy: Inspect wash care, size tags, and neck labels.
- Polybag & Packaging Checks: Ensure polybag thickness, barcode stickers, and warning labels.
- Wash-Test Performance: Validate colorfastness, pilling resistance, and dimensional stability.
1. Measurements and Fit Inspection (Size Spec Verification)
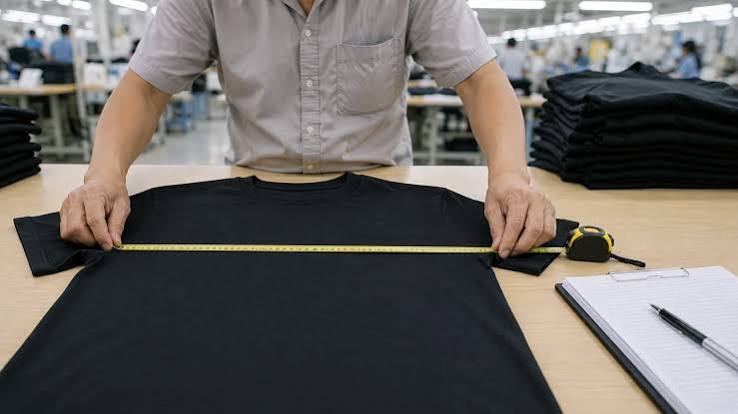
Fit is king in apparel retail. A T-shirt can feature ultra-soft fabric, but if the collar hangs loose or the chest feels tight, your customer will never wear it again. When executing your pre-production sample checklist, place the T-shirt on a completely flat, smooth table without stretching the knit.
💡 Pro Tip for Indian Apparel Brands: Indian sizing standards fall right between US sizing (which runs larger) and Asian/Chinese sizing (which runs smaller). Make sure your size spec tolerance is clear and tailored to your target audience (e.g., standard regular fit vs trendy oversized drop-shoulder fit).
Chest Measurement (Pit-to-Pit)
Measure directly across the chest from armpit seam to armpit seam, roughly 2.5 cm below the armhole join. Multiply by two for full chest circumference. A deviation of more than 1 cm from your tech pack can alter a size Medium into a Small!
Total Body Length
Measure vertically from the High Point Shoulder (HPS)—where the shoulder seam meets the neck collar—straight down to the bottom hem edge. Ensure front length and back length match your specification sheet.
Shoulder Width
Measure across the back from one shoulder point seam straight to the opposite shoulder point seam. For oversized T-shirts, double-check that the drop-shoulder seam falls symmetrically on both sides.
Sleeve Length and Arm Opening
Measure from the top shoulder seam down to the sleeve cuff hem. Next, measure the sleeve opening width. If the sleeve cuff is too tight, it pinches the arms; if too loose, it loses shape after a few hours of wear.
Neck Opening Circumference & Drop
Measure neck width from edge to edge at the collar join, and neck drop from front edge to back seam. A neck hole that is too small makes slipping the T-shirt over one’s head difficult, while a neck hole that is too wide leads to an unsightly, stretched-out “bacon neck.”
Understanding Size Spec Tolerance
In textile manufacturing, achieving 100% identical dimensions down to the millimeter across thousands of T-shirts is virtually impossible due to natural fabric stretch. That is why your tech pack must define an allowable size spec tolerance—typically +/- 1 cm (or +/- 0.5 inches) for T-shirts. If your sample exceeds this tolerance, mark it for correction immediately.
2. Fabric Quality Checks: GSM, Composition & Hand Feel
Fabric represents over 60% of your garment cost. Using a structured T-shirt bulk production checklist ensures your supplier didn’t secretly swap your requested combed cotton with cheaper carded yarn or lower GSM fabric.
       +-------------------------------------------------------+
       |             FABRIC QUALITY EVALUATION MATRIX          |
       +-------------------------+-----------------------------+
       | Parameter               | Target Standard             |
       +-------------------------+-----------------------------+
       | Fabric GSM Test         | Within ±5% of Tech Pack     |
       | Fiber Composition       | 100% Combed / CVC Blend     |
       | Shade Band Approval     | D65 Light Box Match         |
       | Shrinkage Rate          | Max 3% - 5% Post-Wash       |
       | Spirality / Torque      | Under 4% Seam Twisting      |
       +-------------------------+-----------------------------+
Fabric GSM Test (Grams per Square Meter)
GSM measures fabric thickness and density. Summer T-shirts usually range between 160–180 GSM, while premium streetwear tees go up to 220–260 GSM. Use a circular GSM cutter and a calibrated digital weighing scale to verify that your bulk fabric lot matches your initial sample. A variation beyond $\pm 5\%$ is unacceptable.
Fiber Composition Verification
Is your T-shirt 100% Super Combed Cotton, 80/20 CVC (Chief Value Cotton), or a Poly-Cotton blend? Verify the composition by sending a swatch to a local textile testing lab or performing a quick thread burn test. Incorrect fiber composition impacts breathability, softness, and ink absorption.
Fabric Shade Matching & Shade Band Approval
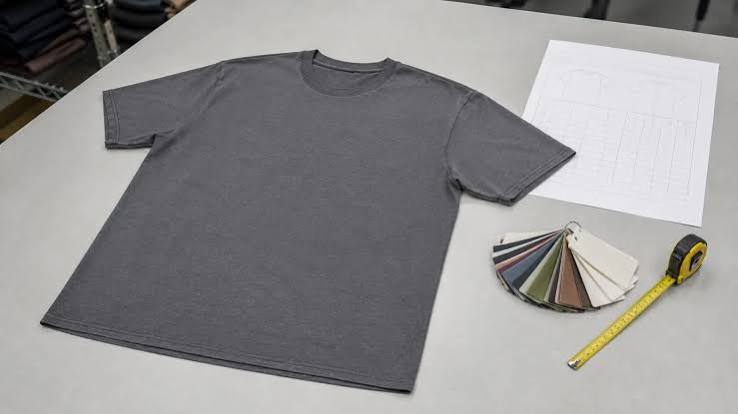
Inspect the garment color under standard laboratory lighting (D65 daylight lamp) against your Pantone shade reference or approved physical lab dip. Fabrics look completely different under warm store lights versus natural sunlight. Always sign off on an official shade band showing acceptable light-to-dark color variation limits.
Hand Feel and Fabric Finish
Touch the T-shirt surface. Has it received the promised Bio-wash (Enzyme wash) or Silicon wash? It should feel smooth, buttery soft, and completely free from fuzzy surface pilling or harsh stiffness.
Shrinkage Test Procedure
All natural cotton fabrics contract after washing. However, pre-shrunk or bio-washed knitted fabric should not shrink more than 3% to 5%. Run your sample through a standard 40°C machine wash and line dry cycle to measure dimensional shrinkage before approving bulk fabric cutting.
Spirality and Torque Checking
Have you ever noticed cheap T-shirts whose side seams twist toward the belly button after one wash? That is called spirality (or fabric twisting), caused by improperly set circular knitting machine tension. Check that spirality remains strictly under 4% post-wash.
3. Garment Construction Checks and Stitching Integrity
Even the finest fabric will tear if garment construction is sub-par. Thorough garment sample checking requires inspecting every single seam inside out.
| Construction Area | What to Check | Standard Quality Requirement |
| Side Seams | Alignment & Tension | Straight 4-thread overlock seam; zero wavy puckering or thread popping when pulled. |
| Shoulder Tape | Reinforcement Binding | Self-fabric or woven tape running shoulder-to-shoulder to prevent neck stretching. |
| Neck Rib | Elasticity & Recovery | 1×1 or 2×1 Spandex ribbing; must stretch easily and snap back flat without sagging. |
| Bottom & Sleeve Hem | Twin-Needle Coverstitch | Clean 1/4″ or 3/16″ double-needle stitch; consistent fold with zero skipped stitches. |
| Stitch Density (SPI) | Stitches Per Inch | 10 to 12 SPI minimum. Lower density leads to weak, unraveling seams during wear. |
4. Print Quality and Graphic Alignment Checks
Custom graphics make or break T-shirt sales. Whether using Screen Printing (Plastisol/Water-based), Direct-to-Garment (DTG), DTF (Direct-to-Film), or High-Density Puff Printing, check these 5 key parameters during your pre-production sample checklist audit:
Print Placement and Centering
Use a measuring tape to check graphic positioning. Standard chest prints should sit approximately 7 cm to 9 cm down from the collar rib join. Ensure the design is perfectly horizontal and centered—even a 5-degree slant ruins the visual appeal!
Print Color Accuracy
Compare printed artwork colors against your vector design file’s Pantone Solid Coated spot codes. Check for opacity, especially when printing bright white or yellow ink over dark black or navy fabrics.
Screen Print Registration
Multi-color screen prints require exact screen alignment. Inspect print edges closely for screen print registration errors, where one color layer bleeds over another leaving unprinted gaps or blurry edges.
Print Hand Feel (Tactile Quality)
Run your hand over the graphic. Heavy plastisol prints can feel like thick rubber patches that lock in sweat—something Indian consumers dislike during hot summers. Ensure your supplier uses high-density soft-hand plastisol or breathable discharge/water-based inks.
Print Adhesion and Stretch Test
Gently stretch the printed fabric sideways. Does the ink film crack, split, or flake off? Perform a thumbnail scratch test. If the ink flakes easily, it was insufficiently cured in the heat tunnel dryer during manufacturing.
5. Labels, Trims, and Packaging Checks
Your brand details add the final professional touch before customer delivery:
- Neck Brand Labels: Verify satin/woven label stitch comfort or heat-transfer tagless label durability. Ensure size lettering (S, M, L, XL, XXL) is accurate.
- Wash Care Labels: Check mandatory fiber content, care icons, manufacturer info, and country of origin (“Made in India”).
- Hang Tags & Barcodes: Ensure hangtag string attachment is sturdy and barcode scanners can read product SKU codes accurately.
- Polybag & Packaging Checks: Verify self-adhesive polybag thickness (minimum 50 microns to comply with Indian plastic waste management rules), suffocation safety warnings, and neat garment folding.
6. Standard Wash-Test Procedure for T-Shirt Samples
Never sign off on a sample until you run a real-world wash test! Here is the step-by-step procedure:
- Pre-Wash Measurements: Record exact chest, length, sleeve, and neck measurements. Take clear high-resolution photos of the print and seams.
- Machine Washing: Wash the T-shirt sample in a standard washing machine using commercial detergent at 40°C on a normal cycle. Wash alongside light and dark garments to check for color bleeding.
- Drying: Air-dry or tumble-dry according to the care label instructions.
- Post-Wash Evaluation:
- Measure all key points again to calculate exact percentage shrinkage.
- Check for side-seam spirality (twisting).
- Inspect graphic prints for fading, cracking, peeling, or color bleeding onto the fabric.
- Examine fabric surface for premature pilling (fuzz balls).
7. How to Record Sample Corrections & Provide Feedback to Factories
If your sample isn’t 100% perfect on round one, don’t panic! Sample revisions are a standard part of apparel manufacturing. The key is providing clear, professional feedback to your factory merchandiser so they hit the target on round two (PP Sample stage).
📝 Golden Rules for Factory Feedback:
- Use Visual Proof: Photograph defect areas with a clear measuring tape overlaid on the garment. Circle errors in red.
- Be Specific with Numbers: Avoid saying “The sleeves feel a bit short.” Instead write: “Sleeve length is 19 cm; tech pack calls for 21 cm. Please increase by +2 cm in revision 2.”
- Maintain a Sample Comments Sheet: Record all revisions in a structured format: Item Code, Sample Status (Approved / Approved with Comments / Rejected), Required Action Date.
8. Downloadable T-Shirt Sample Approval Form Template
To make your manufacturing workflow seamless, use this clean sign-off sheet template whenever reviewing physical prototypes from your vendor:
=================================================================================
                          SAMPLE APPROVAL SIGN-OFF SHEET
=================================================================================
Brand Name: ___________________________   Vendor / Factory Name: ________________
Style Name / SKU: _____________________   Sample Stage: [ ] Proto  [ ] Fit  [ ] PP
Fabric Weight/GSM: ____________________   Date Received: ________________________

---------------------------------------------------------------------------------
CHECK AREA                           STATUS (PASS/FAIL)   COMMENTS & REVISIONS
---------------------------------------------------------------------------------
1. Size Spec & Measurements          [ ] PASS  [ ] FAIL   _______________________
2. Fabric GSM & Hand Feel             [ ] PASS  [ ] FAIL   _______________________
3. Color / Shade Band Approval       [ ] PASS  [ ] FAIL   _______________________
4. Stitching & Construction Integrity[ ] PASS  [ ] FAIL   _______________________
5. Print / Embroidery Quality        [ ] PASS  [ ] FAIL   _______________________
6. Labels & Packaging Checks         [ ] PASS  [ ] FAIL   _______________________
7. Post-Wash Performance             [ ] PASS  [ ] FAIL   _______________________
---------------------------------------------------------------------------------

FINAL SAMPLE STATUS:
[  ] APPROVED FOR BULK PRODUCTION — Proceed as sampled.
[  ] APPROVED WITH COMMENTS — Factory may proceed after making noted tweaks.
[  ] REJECTED — Revised physical sample required before bulk production approval.

Inspector Signature: _______________________      Date: ________________________
=================================================================================
Frequently Asked Questions (FAQs)
Q1. What is the difference between a Proto Sample, Fit Sample, and PP Sample?
A Proto Sample tests the basic style concept using available fabric. A Fit Sample verifies standard sizing and garment drape on a live fit model. A PP (Pre-Production) Sample is the final Golden Sample made with exact bulk production fabric, colors, prints, and trims. Bulk cutting starts ONLY after PP sample sign-off.
Q2. How long does T-shirt sample checking take?
Thorough physical measurement and visual checking take about 30–45 minutes per garment. Including a complete wash and dry test cycle, set aside 24 to 48 hours before issuing final approval to your factory.
Q3. What is an acceptable fabric shrinkage rate for T-shirts?
For 100% knitted cotton garments, an acceptable industry standard shrinkage is between 3% and 5% in both length and width. Any shrinkage exceeding 5% indicates un-pre-shrunk yarn or inadequate fabric finishing.
Q4. Why do T-shirt side seams twist after washing?
Side seam twisting (spirality) happens when circular knitting machine torque is not balanced properly during fabric production, or when pattern cutters cut fabric off-grain relative to the vertical knit Wales. Following our pre-production sample checklist catches this before mass cutting.
Q5. Who pays for sample revisions if the sample fails quality checks?
If the factory failed to follow the agreed tech pack specs, the factory typically absorbs the cost of producing and reshipping revised samples. However, if you request design modifications mid-way, you will cover sample revision charges.
See Also
- T-Shirt Sample Approval Checklist: Fit, Fabric, Print and Labels Before Bulk
- T-Shirt Design Checklist for Non-Designers. Helpful Tips To Create T-Shirt Designs That Sell
- The T-Shirt Printing Checklist You Never Knew You Needed
- T-Shirt Costing Formula India: Calculate Cost Per Piece for 50, 100 and 500 T-Shirts
- Oversized Drop Shoulder T Shirt Size Chart: The Structural Silhouette Guide for Indian Streetwear Fits
- Combed Cotton vs Carded Cotton T-Shirts: Quality, Price, and Printability Compared